Atmel Integrated Development Workflow
Using Atmel Studio with ASF - A Worked Example
Introduction
This page demonstrates how different Atmel development components fit
together to offer a complete embedded development workflow, all managed from
the Atmel Studio Integrated Development Platform (IDP).
This page focuses on using Atmel Studio and the ASF as a stand alone tool.
A separate page demonstrates
how to use Atmel START to generate an Atmel Studio
project.

Atmel Studio download link on the Atmel website
Atmel Studio is shipped with a copy of the Atmel Software Framework (ASF), and
will check the online Atmel Gallery for updated versions each time it is
started. The (ASF) includes FreeRTOS, and numerous FreeRTOS example projects.
It is also possible to access the Gallery manually to both check for
updates to already installed components, and to select new components to install.
Workflow steps continued:
-
Start the Atmel Studio IDE
-
Select the "Tools->Extensions and Updates..." menu item to open the
Extension Manager window. The extension manager links directly
to the online gallery, and will inform you if there are updates
for components that are already installed.
-
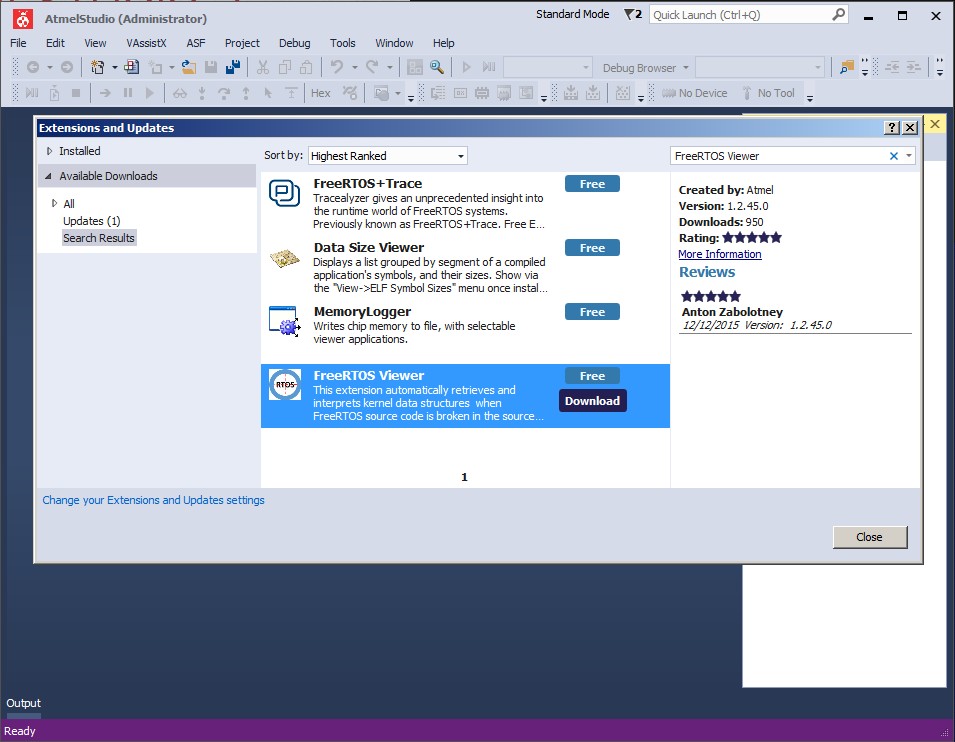
Use the Extension Manager's search box to search for, then
select and install the 'FreeRTOS Viewer' extension.
Searching the Gallery for the FreeRTOS Viewer
Click to enlarge
Atmel Studio will automatically detect Xplained Pro hardware. Other Atmel
development hardware can be selected manually.
Workflow steps continued:
-
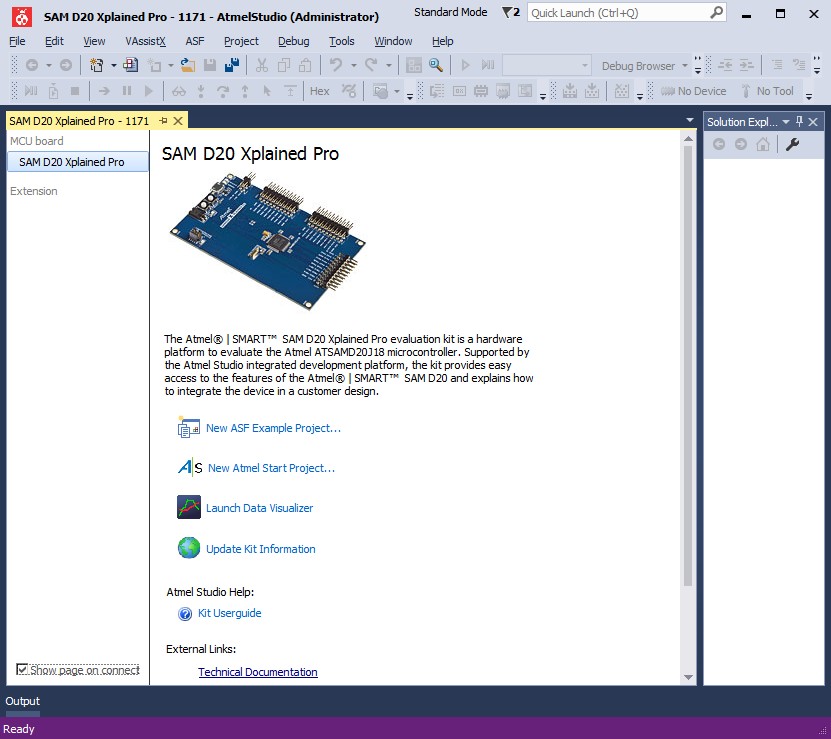
Connect an Atmel Xplained Pro board. A single USB cable is all
that is required. Atmel Studio will automatically display a
page that includes links that are specific to the connected
hardware.
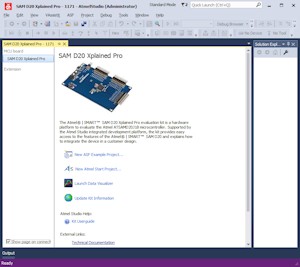
Automatic detection of connected hardware
Click to enlarge
The ASF contains a huge quantity of software, but the complexity is managed
by intelligent filtering.
Workflow steps continued:
-
The first link on the product specific page (that opened when an
Xplained pro board was connected as already described) is "New ASF Example
Project...". Click the link to open the New ASF Example Project
from ASF window.
-
The New Example Project from ASF window will display the subset of ASF
example projects that are specific to the connected hardware. The
list of examples will often include FreeRTOS examples.
The projects can be further organised by Kit, Category, Technology
or Addon.
Select a project of interest and click OK. The project,
including all of its dependencies, will be imported into Atmel
Studio.
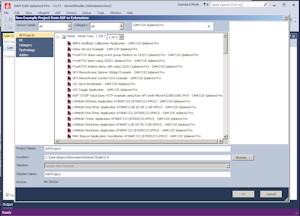
Viewing projects specific to the connected hardware
Click to enlarge
Atmel Studio brings all the building, editing and debugging capabilities of
Visual Studio to Atmel microcontroller development. It even includes the
Visual Assist X
productivity component which provides advanced Intellisense and Content
Assist functionality.
Workflow steps continued:
-
Experiment with the example project imported in the previous step.
In particular note:
-
The 'conf' directory, in which configuration files for
all the components used in the example are placed.
-
The advanced navigation and editing features provided by the Visual
Studio environment, enhanced by the Visual Assist X component.
-
Select the Build->Build Solution menu item to build the example
(or just press F7).
-
Select the Debug->Start Debugging and Break menu item to program
the microcontroller flash memory, start a debug session, and
break on entry to the main() function.
-
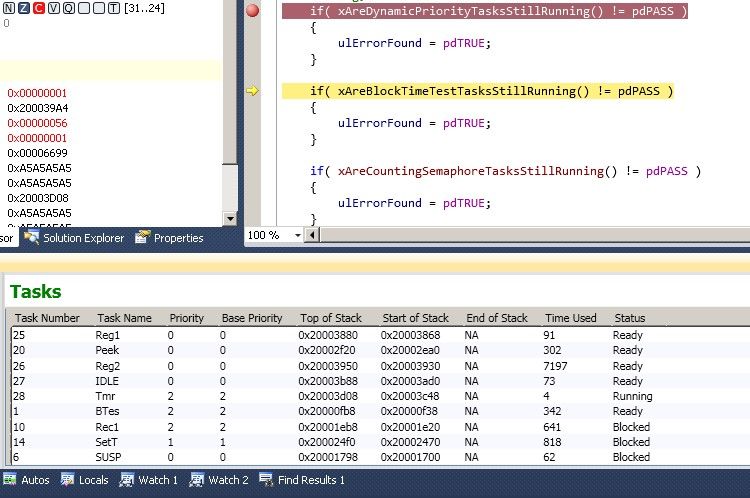
Experiment with the debug controls and windows, including the
FreeRTOS viewer if you selected a FreeRTOS example project.
Example ASF projects use the -O1 optimisation setting by default.
An easier debugging experience can be obtained by rebuilding the
project with optimisation turned off.
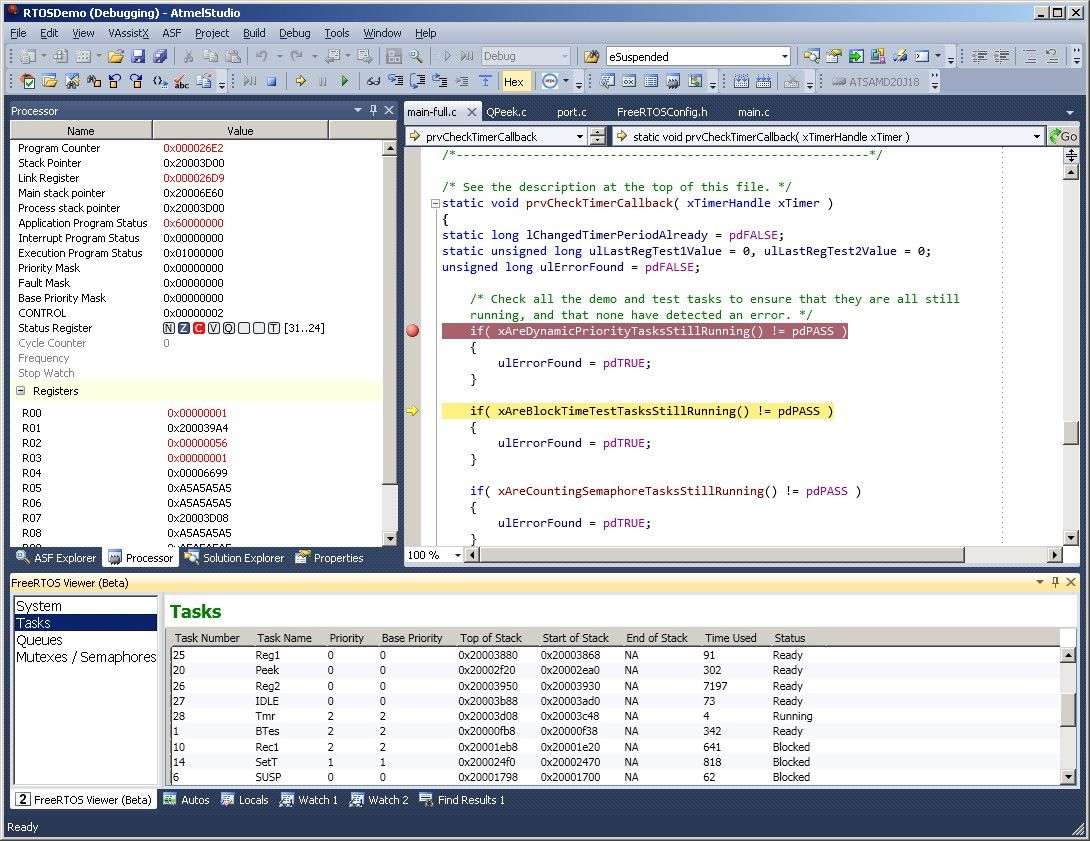
The FreeRTOS viewer plug-in, seen during an Atmel
Studio debug session. Click to enlarge
|
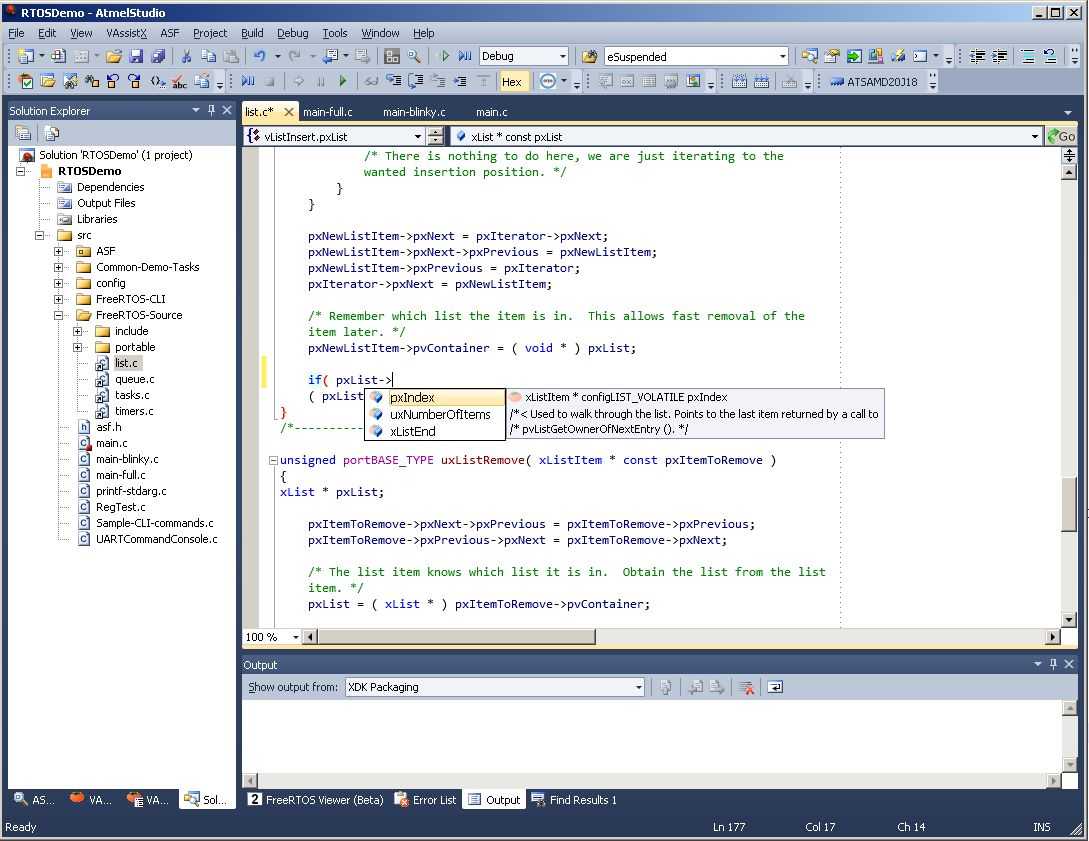
Intellisense and content assist
Click to enlarge
|
ASF software is categorised as peripheral drivers, components and services.
Peripheral drivers are drivers for on chip peripherals. Components are
drivers for off chip components such as SD cards, flash chips, displays, etc.
Services are more application orientated drivers, such as USB class drivers.
All the ASF software is accessible using the ASF wizard.
Workflow steps continued:
-
End the debug session, if it is still in progress.
-
Select the ASF->ASF Wizard menu item to open the ASF Wizard
window.
The right side of the ASF Wizard window will show the ASF software
that is already included in the example project, along with the software's
configuration where applicable. The left side of the ASF Wizard
window will show the ASF software that is available to be added to
the project. Only software applicable to the connected hardware
is shown.
-
Select an ASF software item from the window on the left side. A brief description of
the selected item, and a link to the item's quick start
guide will be displayed at the bottom of the ASF Wizard window.
The quick start guide provides information on using the software
item, and links to the software's API documentation.
-
Use the right arrow button to have Atmel Studio move the selected item to the
right side. The ASF wizard will also automatically move any additional
software on which the selected item is dependent - if any.
-
ASF items selected for inclusion in the project (those shown in the right side of the Wizard's window)
can be configured directly in the ASF wizard. Configuration
options are presented as drop down lists. Expand the selected
item to see if any configuration options exist. If so,
configure the option as desired, then click the Apply button.
The ASF wizard will prepare your example project to use the
newly selected components by:
-
Copying the necessary source files into the project.
-
Adding the necessary configuration file into the 'config'
directory.
-
Update the project's include path as necessary.
Copyright (C) Amazon Web Services, Inc. or its affiliates. All rights reserved.