Installing the Development Tools
and importing the LPCOpen package
The workflow steps on this page are used to create the development environment
that is then used to build the projects described on the pages that follow.
The LPCOpen package contains multiple example projects that target multiple
off the shelf evaluation boards. Each example project comes with build files
that enable it to be built with either the
IAR Embedded Workbench,
Keil uVision, or
LPCXpresso development tools. The instructions and images
on this page demonstrate the LPCXpresso tools being used to target the
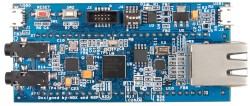
LPC1830 Xplorer
board from NGX Technologies.
Reading through the instructions will enable you to see exactly what LPCOpen
is, how it can be used, and the advantages it can bring your development - even
if you don't have the hardware available to actually try it out for yourself.
Workflow steps:
-
Download and install
the LPCXpresso Eclipse based IDE, which comes bundled with the GCC compiler for ARM.
The IDE needs to be activated after installation, but activation is free.
-
Download, but
don't unzip the LPCOpen package that is correct for your
chosen compiler and hardware - the LPC18xx Cortex-M3 microcontroller
in this case.
The LPCOpen zip file contains:
-
An LPC chip support project
The chip support project will be correct for the LPCOpen
package selected for download in step above. In this case it
contains the LPC1800 and Cortex-M specific driver code.
-
A board support project
The board support project will be correct for the LPCOpen
package selected for download in step above. In this case it
contains the software necessary to map inputs and outputs used by
the example projects to the inputs and outputs provided on the
NGX Xplorer evaluation board.
-
Multiple example projects
The example projects use the chip support and board support projects to
demonstrate how to use the LPCOpen drivers and middleware.
Workflow steps:
-
Select 'Import' from the LPCXpresso 'File' menu. The Import
dialogue box will appear. In the dialogue box select 'General |
Existing Projects into Workspace'.
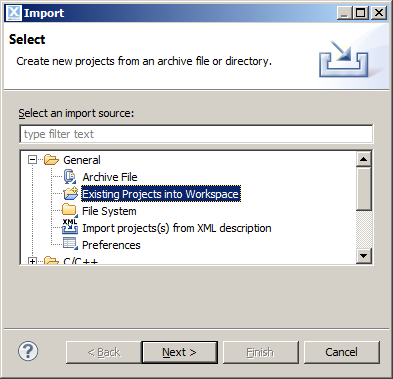
Selecting 'Existing Projects into Workspace'
-
In the next window select the 'Select archive file' radio box, then
browse to and select the LPCOpen zip file that has already been
downloaded. All the projects contained within the zip file will
be displayed in the 'Projects' window.
-
The LPC1800 chip support and the LPC1800 Xplorer board support
projects (as described above) are highlighted in the image below.
Check these two projects, then click finish to import the projects
into the LPCXpresso workspace.
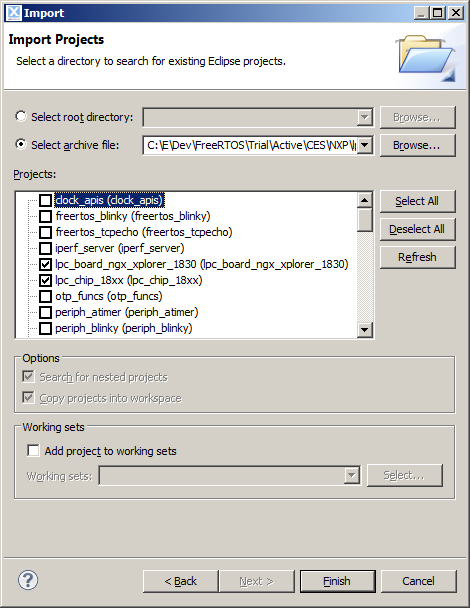
The list of projects in the LPCOpen zip file
Next:
Making use of the USB drivers in the LPC microcontroller hardware (without FreeRTOS)
Copyright (C) Amazon Web Services, Inc. or its affiliates. All rights reserved.