The demo uses:
uIP and LPCUSB are licensed separately from FreeRTOS. Users must familiarise themselves with the uIP and LPCUSB licenses respectively. The FreeRTOS ARM Cortex-M3 port includes a full interrupt nesting model. Interrupt priorities must be set in accordance with the instructions on the Customisation page for correct operation. IMPORTANT! Notes on using the NXP Semiconductors ARM Cortex-M3 Web Server DemoPlease read all the following points before using this RTOS port.See also the FAQ My application does not run, what could be wrong? Source Code OrganisationThe Red Suite project for the LPC1768 demo is located in the FreeRTOS/Demo/CORTEX_LPC1768_GCC_RedSuite directory. This is the directory to select when importing the project into your Red Suite workspace.The FreeRTOS zip file download contains the files for all the ports and demo application projects. It therefore contains many more files than used by this demo. See the Source Code Organization section for a description of the downloaded files and information on creating a new project.
The Demo ApplicationCreating the project directory structureThe easiest way to use an Eclipse managed make build is to locate the required build files (C source files, header files and linker scripts) under the directory that contains the Eclipse project file. FreeRTOS/Demo/CORTEX_LPC1768_GCC_RedSuite/CreateProjectDirectoryStructure.bat is a batch file that will copy the required files from their normal locations within the FreeRTOS directory structure to sub directories under the Eclipse project directory. The batch file must be executed prior to attempting a build.Execute CreateProjectDirectoryStructure.bat from either a command prompt or Windows explorer. It cannot be executed successfully from within the Eclipse environment itself.
Importing the project into a Red Suite workspace

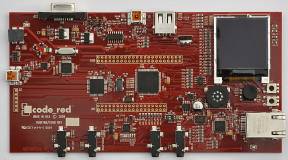
Importing the FreeRTOS project into the Red Suite workspace Web server configurationConnect the RDB1768 development board to a computer running a web browser either directly using a point to point (crossover) cable, or via a Ethernet switch using a standard Ethernet cable.The IP address used by the demo is set by the constants configIP_ADDR0 to configIP_ADDR3 within the file FreeRTOS/Demo/CORTEX_LPC1768_GCC_RedSuite/src/FreeRTOSConfig.h. The MAC address and net mask are configured within the same header file. The IP addresses used by the web browser computer and the RDB1768 development board must be compatible. This can be ensured by making the first three octets of both IP addresses identical. For example, if the web browser computer uses IP address 192.168.100.1, then the development board can be given any address in the range 192.168.100.2 to 192.168.100.254 (barring any addresses already present on the network).
Building and executing the demo application
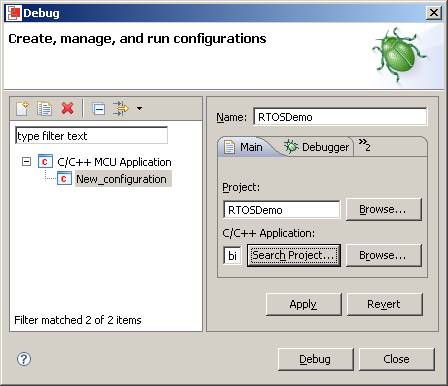 Setting up the launch configuration
FunctionalityThe demo application creates 36 tasks prior to starting the RTOS scheduler. These tasks consist predominantly of the standard demo application tasks (see the demo application section for details of the individual tasks). Their only purpose is to test the RTOS kernel port and provide a demonstration of how to use the various API functions.The following tasks and tests are created in addition to the standard demo tasks:
When executing correctly the demo application will behave as follows:
Served Web PagesThe top of each served page includes a menu containing a link to every other page.
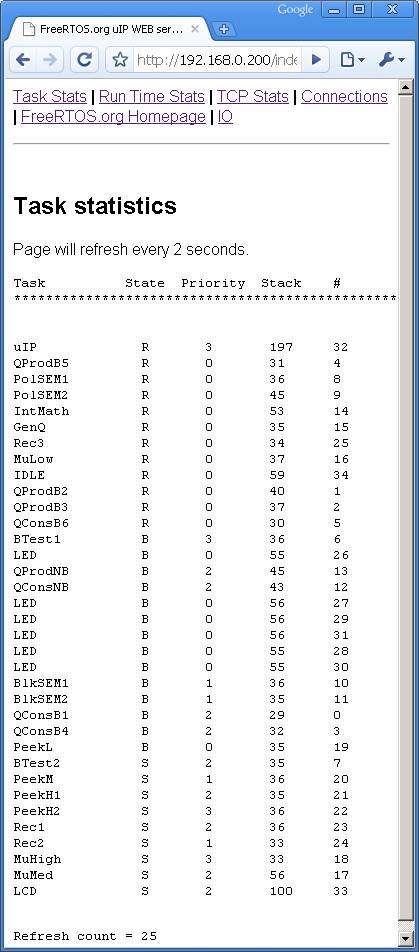 The served RTOS stats page showing status information on each task in the system.
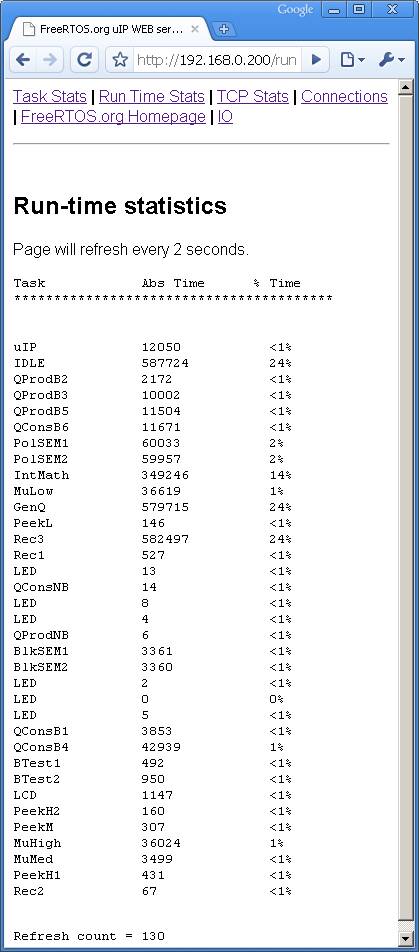 The served run time stats page showing the processor utilisation of each task.
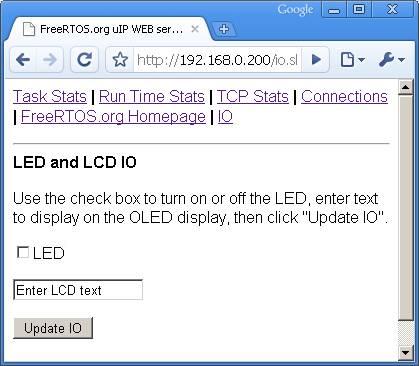 The served IO page The IO page provides a simple interface that permits data to be sent to an LED. The check box permits the state of the user LED to be both set and queried. Changes are sent to the target hardware by clicking the "Update IO" button. The TCP Stats and Connections pages display run time networking information.
RTOS Configuration and Usage DetailsRTOS port specific configurationConfiguration items specific to these demos are contained in FreeRTOS/Demo/CORTEX_LPC1768_GCC_RedSuite/src/FreeRTOSConfig.h. The constants defined in this file can be edited to suit your application. In particular -
The lowest priority on a ARM Cortex-M3 core is in fact 255 - however different ARM Cortex-M3 vendors implement a different number of priority bits and supply library functions that expect priorities to be specified in different ways. Use the supplied examples as a reference. Each port #defines 'BaseType_t' to equal the most efficient data type for that processor. This port defines BaseType_t to be of type long. Note that vPortEndScheduler() has not been implemented. Interrupt service routinesIn the demo application the vector table remains in flash.Unlike most ports, interrupt service routines that cause a context switch have no special requirements and can be written as per the compiler documentation. The macro portEND_SWITCHING_ISR() can be used to request a context switch from within an ISR. An example interrupt service routine called vEMAC_ISR() is provided in FreeRTOS/Demo/CORTEX_LPC1768_GCC_RedSuite/src/webserver/emac.c. This should be used as a reference example. Note that portEND_SWITCHING_ISR() will leave interrupts enabled. Switching between the pre-emptive and co-operative RTOS kernelsSet the definition configUSE_PREEMPTION within FreeRTOS/Demo/CORTEX_LPC1768_GCC_RedSuite/src/FreeRTOSConfig.h to 1 to use pre-emption or 0 to use co-operative.Compiler optionsAs with all the ports, it is essential that the correct compiler options are used. The best way to ensure this is to base your application on the provided demo application files.Memory allocationSource/Portable/MemMang/heap_2.c is included in the ARM Cortex-M3 demo application project to provide the memory allocation required by the RTOS kernel. Please refer to the Memory Management section of the API documentation for full information.Copyright (C) Amazon Web Services, Inc. or its affiliates. All rights reserved.
|
|||||||||||||||||||