Kinetis K60 ARM Cortex-M4 Demo
Using the IAR toolchain, and including a simple web server
[Embedded Ethernet Examples]
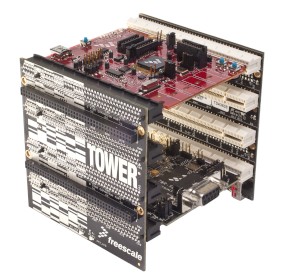
The TWR-K60N512 controller module and
TWR-SER peripheral module in the
TWR-K60N512-KIT tower kit
This page documents a FreeRTOS ARM Cortex-M4 demo application that targets the
Freescale Kinetis K60 microcontroller.
An IAR project is provided that is pre-configured to run on the
TWR-K60N512
controller module. The FreeRTOS plug-in included in the main IAR tools distribution
can be used with this demo!
Note: If this project fails to build then it is likely the version of IAR
Embedded Workbench being used is too old. If this is the case, then it is also
likely that the project file has been (silently) corrupted and will need to be
restored to its original state before it can be built even with an updated IAR version.
The demo application includes an example web server that uses a modified version
of the tiny uIP TCP/IP stack. Code-named FreeTCPIP, the modifications allow for
higher throughput than that achievable with the original code. CGI scripting is
used to serve pages that include both RTOS and TCP/IP run time information. uIP
was originally written by Adam Dunkels and is open source but licensed separately
from FreeRTOS. Users must familiarise themselves with the uIP licence, which
is included at the top of each uIP source file.
The TWR-K60N512 does not itself include an Ethernet connector,
so a TWR-SER peripheral module is
also required to make use of the embedded web server example. The two modules can
be purchased together in the
TWR-K60N512-KIT tower kit.
The FreeRTOS Interactive site also contains a community contributed K60
demo that uses the open source lwIP TCP/IP stack.
IMPORTANT! Notes on using the FreeRTOS IAR Kinetis ARM Cortex-M4 example project
Please read all the following points before using this RTOS port.
-
Source Code Organisation
-
The Demo Application
-
RTOS Configuration and Usage Details
See also the FAQ My application does not run, what could be wrong?
Source Code Organisation
The IAR Embedded Workbench workspace for the Kinetis K60 demo is called RTOSDemo.eww, and is located in the
FreeRTOS/Demo/CORTEX_Kinetis_K60_Tower_IAR directory. IAR's EWARM V6.20
or higher is required to open the workspace.
The official FreeRTOS zip file download contains source code for all the FreeRTOS ports,
and every demo application project.
It therefore contains many more files than are required to build and run the Kinetis K60 demo. See the
Source Code Organization section for a description
of the downloaded files, and information on creating a new project.
The Freescale Kinetis K60 Demo Application
Functionality
The IAR project contains two build configurations:
|
Build configuration
|
Description
|
|
Blinky
|
This is a very simple configuration. It creates two tasks,
one software timer, and also uses a button interrupt.
The two tasks communicate via a queue. The receiving task
toggles the blue LED each time a value is
received.
Pressing user button SW2 generates an interrupt. The interrupt
service routine for which resets a software timer, then turns the green LED on.
The software timer has a five second period. The timer will expire
when SW2 has not been pressed again for a full five seconds. The
callback function that executes when the timer expires simply turns
the green LED off again.
Therefore, pressing SW2 will turn the LED on, and the LED will
remain on until a full five seconds pass without the button being
pressed again.
The Blinky build configuration uses the
main-blinky.c source file. The Full build configuration uses
the main-full.c source file.
|
|
Full
|
This is a comprehensive configuration that creates lots of tasks,
queues, semaphores (of various types) and software timers.
The Full configuration creates the same tasks and timers that are
created by the Blinky build configuration (although different LEDs
are used). In addition to these,
the Full configuration also creates a lot of tasks from the set of
standard demo
tasks, and a simple web server task.
The standard demo tasks don't perform any particular function.
Their purpose is firstly to test the FreeRTOS port, and secondly to
provide examples of how to use the FreeRTOS API functions.
The Full build configuration creates yet more timers that are neither
part of the Blinky configuration, or the set of standard demo tasks.
These additional tasks are described briefly below this table.
In total, the Full configuration creates nearly 40 tasks!
Use the blinky build configuration if a simpler demo is required to
get started with.
|
Software timers that are created by the Full build configuration, that are
not part of either the Blinky demo, or the standard demo tasks, include:
- A "Check" software timer and callback
The check timer period is initially set to three seconds. The check timer
callback function checks that all the standard demo tasks are not only still
executing, but are executing without reporting any errors. If the check
timer discovers that a task has either stalled, or reported an error, then it
changes its own period from the initial three seconds, to just 200ms.
The
check timer callback function also toggles the orange/red LED each time it is
called. This provides a visual indication of the system status: If the LED
toggles every three seconds, then no issues have been discovered. If the LED
toggles every 200ms, then an issue has been discovered with at least one
task.
The last reported issue is latched into the pcStatusMessage variable,
and displayed at the bottom of the "task stats" web page served by the
embedded web server task.
- Two very simple LED flash timers that share a callback
All the simple LED flash timers do is toggle an LED each when the timer
callback function is executed. The two timers share a callback function, so
the callback function parameter is used to determine which timer actually
expired, and therefore, which LED to toggle. Both timers use a different
frequency, one toggles the blue LED and the other the green LED.
- A web server task
This is the task that runs the uIP TCP/IP stack. All network related
processing is performed in this task, making the TCP/IP Flash and RAM
footprint extremely small compared to other embedded TCP/IP implementations.
The served web pages are demonstrated further down this documentation page.
Hardware set up
All demo functionality, with the exception of the web server, will run on a TWR-K60N512
tower processor module, in its default configuration. J6 must be across pins 2 and 3
if the TWR-K60N512 is used without the rest of the tower kit.
The demo was created and
tested using a J-Link to both debug and power the module. Powering the module from
a J-Link requires jumper J12 to be fitted. With this configuration, terminal IO
(printf()) is sent to the terminal IO window inside the IAR Embedded Workbench IDE.
To use the web server, the TWR-SER module is also required, and both the
TWR-SER and TWR-K60N512 modules require jumpers moving from their default positions.
The jumper changes are required because the demo is configured to communicate with
the PHY using RMII mode - which in turn necessitates that the clock routed to the
PHY remains synchronised with that routed to the K60. The required jumper positions
are shown in the table below. Incorrect jumper positions can cause the
network functionality to be slow and erratic.
|
Module
|
Jumper
|
Required Position
|
|
TWR-K60N512
|
J6
|
Across pins 2 and 3
|
|
TWR-SER
|
J2
|
Accross pins 3 and 4
|
|
TWR-SER
|
J3
|
Accross pins 2 and 3
|
|
TWR-SER
|
J12
|
Across pins 9 and 10 only (only one jumper fitted).
|
Web server configuration
The IP address used by the microcontroller board is set by the constants
configIP_ADDR0 to configIP_ADDR3. These are specified at the bottom of the
FreeRTOSConfig.h header file that is located in the project directory. Constants
that define the MAC address and the NET mask are located in the same place of
the same file.
The IP addresses used by the web browser and the Kinetis K60 development board must be
compatible. This can be ensured by making the first three octets of both IP
addresses the same. For example, if the web browser computer uses IP address
192.168.0.1, then the Kinetis K60 development board can be given any address in
the range 192.168.0.2 to 192.168.0.254 (other than any addresses that already
exist on the same network).
The MAC address assigned to the Kinetis K60 must be unique on the network to
which it is being attached.
The web server demo was developed and tested using a point to point (cross over)
cable. A standard Ethernet cable may also be suitable - but is untested.
Building and executing the demo application
-
Open the RTOSDemo.eww Embedded Workbench workspace
from within the Embedded Workbench IDE.
-
Select the required build configuration.
-
Select "Build All" from the Embedded Workbench "Project" menu - the demo
application should build without errors.
-
When the build completes, select "Download and Debug" from the Embedded Workbench
"Project" menu (or just press CTRL+D) to program the microcontroller flash memory,
and start a debug session. The application will start to run, and then
break on entry to the main() function.
Using the web server
The top of each served page includes a menu with links to every other page.
- Open a web browser on the connected computer.
- Type "HTTP://" followed by the target IP address into the browsers address bar.
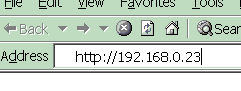 Entering the IP address into the web browser
(obviously use the correct IP address for your system)
The served web pages
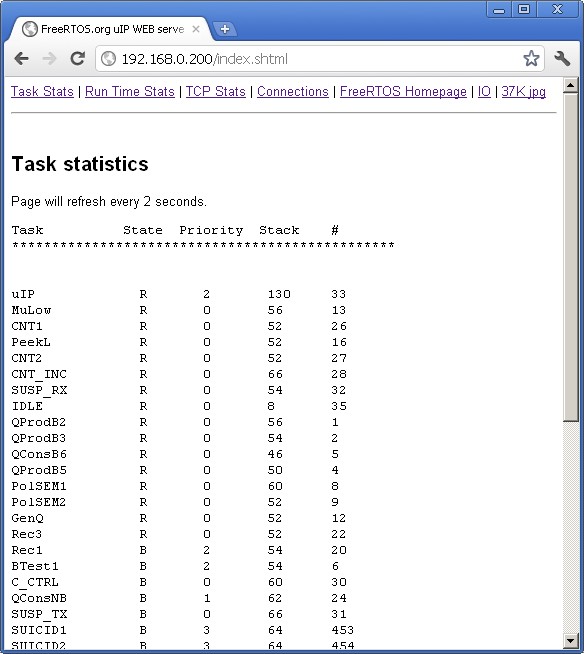 The served task statistics page
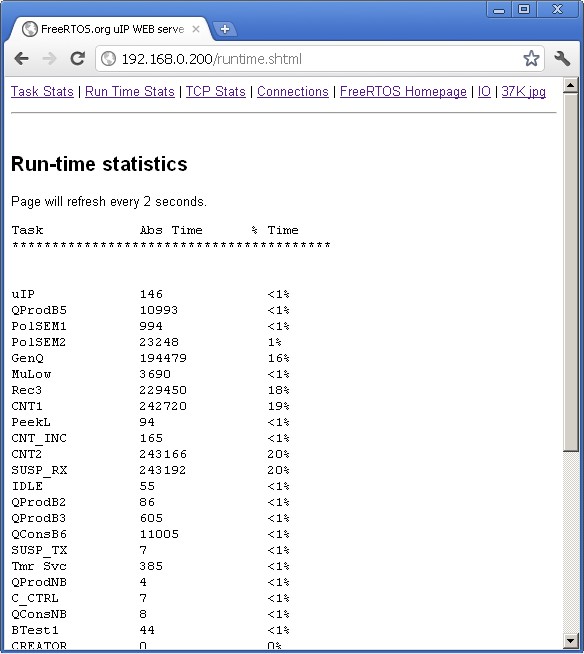
The served run time stats page - showing
how much CPU time each task has consumed
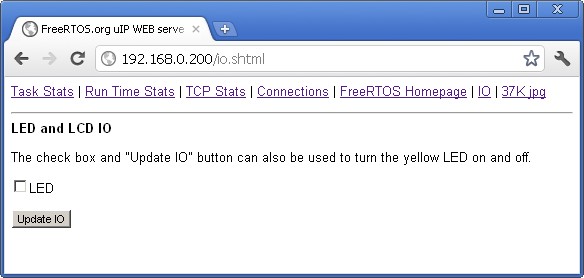
The served IO page used to turn an LED
on and off using a CGI script.
The IO page provides a simple interface to permit the yellow LED to be turned on and off from a web browser.
Changes are sent to the target board whenever the "Update IO" button is clicked, or the page is refreshed.
Other served pages include TCP/IP statistics and a large JPG image. All the web pages are included in the downloaded
binary image - which can make the binary image appear to be quite large (the jpg file by itself is in excess of 36K).
Cortex-M FreeRTOS port specific configuration
Configuration items specific to this demo are contained in FreeRTOS/Demo/CORTEX_Kinetis_K60_Tower_IAR/FreeRTOSConfig.h.
The constants defined in this file can be edited to suit your application. In particular -
- configTICK_RATE_HZ
This sets the frequency of the RTOS tick interrupt. The supplied value of 1000Hz is useful for
testing the RTOS kernel functionality but is faster than most applications require. Lowering this value will improve efficiency.
- configKERNEL_INTERRUPT_PRIORITY and configMAX_SYSCALL_INTERRUPT_PRIORITY
See the RTOS kernel configuration documentation for full information on these configuration constants.
- configLIBRARY_LOWEST_INTERRUPT_PRIORITY and configLIBRARY_MAX_SYSCALL_INTERRUPT_PRIORITY
These are equivalents to configKERNEL_INTERRUPT_PRIORITY and configMAX_SYSCALL_INTERRUPT_PRIORITY, but presented in a form
suitable for passing into the Freescale set_irq_priority() library function. The set_irq_priority() function expects
priorities to be in the range of 0 to 15 - 0 being the highest priority and 15 being the lowest priority.
Interrupt safe FreeRTOS API functions must not be called from an interrupt that has a priority above that
defined by configLIBRARY_MAX_SYSCALL_INTERRUPT_PRIORITY. Doing so will make your application unstable. This is the
most common error when using FreeRTOS on ARM Cortex-M devices!
Attention please!: See the page dedicated to setting interrupt priorities on ARM Cortex-M devices. Remember that ARM Cortex-M cores use
numerically low priority numbers to represent HIGH priority interrupts. This
can seem counter-intuitive and is easy to forget! If you wish to assign an
interrupt a low priority do NOT assign it a priority of 0 (or other low numeric
value) as this will result in the interrupt actually having the highest priority
in the system - and therefore potentially make your system crash if this
priority is above configMAX_SYSCALL_INTERRUPT_PRIORITY. Also, do not leave
interrupt priorities unassigned, as by default they will have a priority of 0
and therefore the highest priority possible.
The lowest priority on a ARM Cortex-M core is in fact 255 - however different
Cortex-M vendors implement a different number of priority bits and supply library
functions that expect priorities to be specified in different ways. For example,
on Kinetis microcontrollers, the lowest priority you can specify is in fact 15 - this is defined by the constant
configLIBRARY_LOWEST_INTERRUPT_PRIORITY in FreeRTOSConfig.h. The highest priority
that can be assigned is always zero.
It is also recommended to ensure that all four priority bits are assigned as
being premption priority bits, and none as sub priority bits.
Each port #defines 'BaseType_t' to equal the most efficient data type for that
processor. This port defines BaseType_t to be of type long.
Interrupt service routines
In this demo, interrupts are installed into the vector table inside the vectors.h
header file.
Unlike most ports, interrupt service routines that cause a context switch have
no special requirements, and can be written as per the compiler documentation.
The macro portEND_SWITCHING_ISR() can be used to request a context switch from
within an interrupt service routine.
Note that portEND_SWITCHING_ISR() will leave interrupts enabled.
This demo project provides examples of FreeRTOS interrupt service routines -
namely vPort_E_ISRHandler() defined in main-full.c and main-blinky.c, and the
three Ethernet interrupt handlers vEMAC_TxISRHandler(), vEMAC_RxISRHandler and vEMAC_ErrorISRHandler() defined in
emac.c.
Only FreeRTOS API functions that end in "FromISR" can be called from an
interrupt service routine - and then only if the priority of the interrupt
is less than or equal to that set by the configMAX_SYSCALL_INTERRUPT_PRIORITY
configuration constant.
Resources used by FreeRTOS
FreeRTOS requires exclusive use of the SysTick and PendSV interrupts. SVC number #0 is also used.
Switching between the pre-emptive and co-operative RTOS kernels
Set the definition configUSE_PREEMPTION within RTOSDemo/FreeRTOSConfig.h to 1 to use pre-emption or 0
to use co-operative. The full demo application may not execute correctly when the co-operative RTOS scheduler is
selected.
Compiler options
As with all the ports, it is essential that the correct compiler options are used. The best way to ensure this is to base your
application on the provided demo application files.
Memory allocation
Source/Portable/MemMang/heap_2.c is included in the K60 demo application project to provide the memory
allocation required by the RTOS kernel.
Please refer to the Memory Management section of the API documentation for
full information.
Miscellaneous
Note that vPortEndScheduler() has not been implemented.
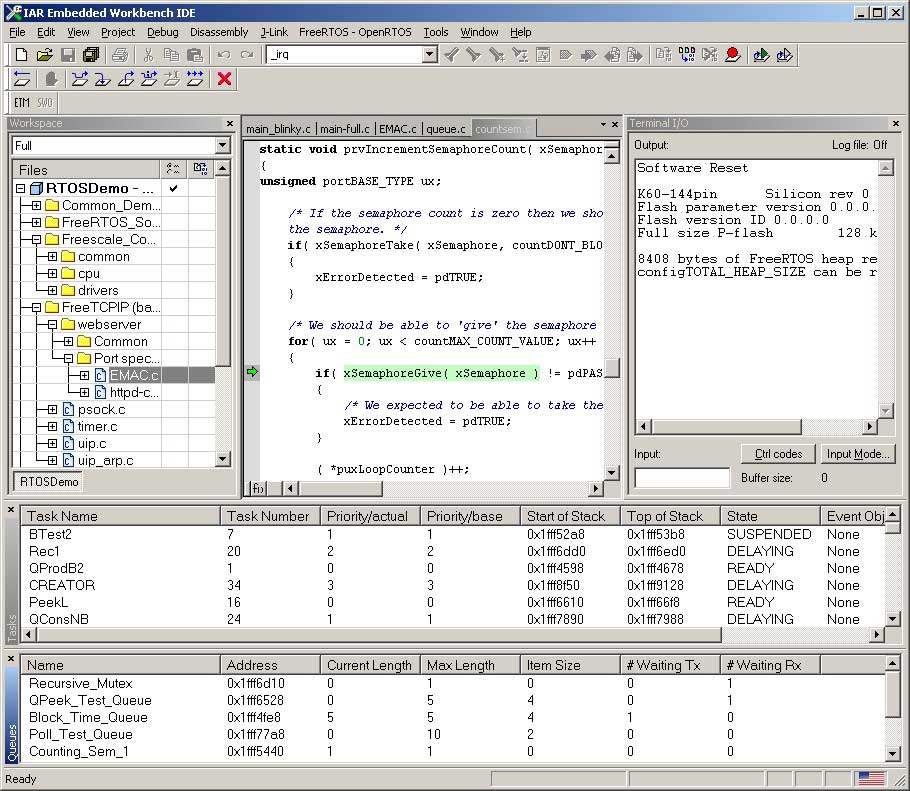
The EWARM IDE with the FreeRTOS plug-in Tasks and Queues windows visible.
Also visible is the terminal IO window to which printf() output is routed
Copyright (C) Amazon Web Services, Inc. or its affiliates. All rights reserved.