corePKCS11 机制和摘要演示
简介
本演示是 corePKCS11 演示系列中的第二个。它介绍了 PKCS #11 API 部分,
这部分用于查询 PKCS #11 插槽的能力,并使用该插槽创建消息摘要。PKCS #11 标准可在
此处查阅。插槽是一个可以放置令牌的接口。令牌是一种专门用于加密操作(如保存密钥、生成密钥)
以及为普通操作(如创建 SHA 摘要)提供硬件加速
的硬件设备。
corePKCS11 演示项目使用
FreeRTOSWindows 端口,
因此可以在 Windows 上使用免费社区版
Visual Studio 进行构建和评估,而无需任何特殊 MCU 硬件。
此演示中展示的函数集可分为:
源代码组织
基于 corePKCS11 的相互身份验证演示的 Visual Studio 解决方案称为
pkcs11_demo.sln,位于
主 FreeRTOS 下载文件的 FreeRTOS\FreeRTOS-Plus\Demo\corePKCS11_Windows_Simulator\
目录中。
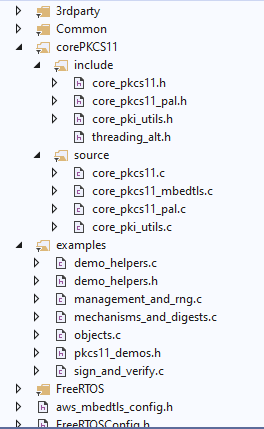
点击放大
配置演示项目
要配置演示项目,请将 configPKCS11_MECHANISMS_AND_DIGESTS_DEMO 设置为 1
(在pkcs11_demo_config.h中)。
构建演示项目
此演示项目使用的是
免费社区版 Visual Studio。
- 在 Visual Studio IDE 内打开
FreeRTOS\FreeRTOS-Plus\Demo\corePKCS11_Windows_Simulator\pkcs11_demos.sln
Visual Studio 解决方案文件。
- 在 IDE 的 build 菜单中选择 build solution。
功能
启用后,此演示的入口点为 vPKCS11MechanismsAndDigestDemo。此演示的目的是查询一个插槽的能力,
然后用这个插槽来生成一份摘要。得益于可在运行时查询令牌能力,
在将令牌换入和换出插槽时具有更大的灵活性。大多数时候,
令牌将保留在插槽中,但如果它被移除,那么能力将有可能改变。对于此演示,
使用 SHA-256 算法来创建摘要。
查询摘要能力:
CK_MECHANISM_TYPE xMechanismType = 0;
CK_MECHANISM_INFO MechanismInfo = { 0 };
xResult = pxFunctionList->C_GetMechanismInfo( pxSlotId[ 0 ],
CKM_SHA256,
MechanismInfo );
configASSERT( CKR_OK == xResult );
if( 0 != ( CKF_DIGEST & MechanismInfo.flags ) )
{
configPRINTF( ( "The Cryptoki library supports the " \
"SHA-256 algorithm.\r\n" ) );
}
else
{
configPRINTF( ( "The Cryptoki library doesn't support the " \
"SHA-256 algorithm.\r\n" ) );
}
创建散列是一个非常常见的操作,有许多用途。例如,Git 使用散列来唯一地识别
commits。另一个例子是 Python 字典,它使用每个关键值的散列来实现更快的查找。加密
操作使用散列来验证消息或通信的完整性。通常,它们与
签名结合,以核实消息和消息发件人的完整性。签名将在
“签名和验证”演示页面中介绍。
虽然摘要操作不需要任何特定的硬件,但它们仍然包括在 PKCS #11 中,
以允许为所有加密操作创建一个独立的、功能齐全的模块。这有助于缩小
漏洞范围,并使应用程序的测试更加容易。由于散列在加密操作中很常用,
(如 TLS 握手协议),散列算法中的漏洞可能会导致机密泄露和数据丢失。为
防止这种情况,PKCS #11 允许您在其自己的模块中实现加密操作所需的全部功能
。这允许您创建一个安全属性可以独立验证的独立安全模块
。同时还允许应用程序保护敏感数据。
用 PKCS #11 生成摘要的过程可分成三个步骤。首先,
通过 C_DigestInit() 将创建摘要的机制传递给 PKCS #11。然后,用
C_DigestUpdate() 传递包含消息的缓冲区及其长度。最后,通过调用
C_DigestFinal(),创建散列并将其放入一个缓冲区中。
创建摘要:
xDigestMechanism.mechanism = CKM_SHA256;
xResult = pxFunctionList->C_DigestInit( hSession,
xDigestMechanism );
configASSERT( CKR_OK == xResult );
xResult = pxFunctionList->C_DigestUpdate( hSession,
pxKownMessage,
sizeof( pxKownMessage ) - 1 );
configASSERT( CKR_OK == xResult );
xResult = pxFunctionList->C_DigestFinal( hSession,
xDigestResult,
ulDigestLength );
configASSERT( CKR_OK == xResult );
一个有趣的练习是比较由 PKCS #11 操作生成的散列与由
不同工具的 SHA-256 实现生成的散列。大多数 Linux 发行版、MacOS 和 Windows 都支持 OpenSSL。
请参阅 OpenSSL 说明,以便在您的平台上安装。
通常,因为 OpenSSL 常用于建立 TLS 连接,所以大多数设备上都安装了 OpenSSL。或者,
hashlib 模块是 Python3 标准库的一部分,
可在支持 Python3 的设备上跨平台使用。
使用 OpenSSL:
$ echo -n "Hello world\ | openssl dgst -sha256
使用 Python3 shell:
>>> import hashlib

>>> hashlib.sha256("Hello world!".encode("utf8")).hexdigest()
两者的输出以及演示的输出应为:
"c0535e4be2b79ffd93291305436bf889314e4a3faec05ecffcbb7df31ad9e51a"。生成散列值后,可以对它们进行比较,
以验证消息是否确实是 "Hello world!"。
Copyright (C) Amazon Web Services, Inc. or its affiliates. All rights reserved.